
User's Modifications
Other than customising buttons and menus, and occasionally fitting add-on accessories such as filters/flashes/tripods, are we suggesting that the user actually modifies a FZ300 camera?
Well, not in any significant way of course, because any non-removable change:
- is highly unlikely to improve such an integrated and sealed piece of machinery.
- will make your buyer's guarantee void.
However, we have found so far three touches that:
- are within the reach of any reasonably skilled hobbyist.
- in our opinion can subtly improve the handling of the FZ300.
- are easy to remove for either guarantee or resale purposes.
Paint the Lens Hood Mounting Mark
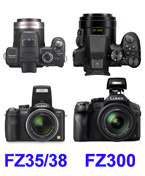
In old models such as the FZ35, the camera had lots of marks which were quite difficult to spot under low light conditions, and I had applied drops of bright paint to be able to see them clearly. The FZ300 is much improved in this respect, as all those marks now come nicely painted white.
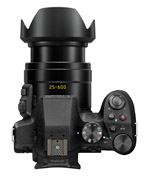
But Panasonic forgot the lens hood! It carries two “mounting marks” (at 180º distance from each other), which help when aligning the hood against the lens before turning the hood to secure it. Also, once you have turned the hood until it clicks, the mounting marks allow to verify that the hood is secured properly. Unfortunately, these mounting marks are just small grooves, painted black as the rest of the hood, and therefore not easy to spot under some lighting conditions, for example indoors.
You can improve this significantly by painting these grooves: just use a hobby/model enamel of any colour you like. To avoid spilling outside the groove, instead of a brush just use a toothpick to place inside the groove a small drop of paint, then extend it to the whole groove.
If there was an accidental spill anyway, quickly remove it by applying some thinner with a small piece of toilet paper: ensure to remove the thinner immediately with a dry piece of toilet paper, and there will be no damage to the hood black surface.
You may also find it useful to apply a small (1mm. diameter) drop of paint on the lens at the point where the hood's mounting mark should be aligned, i.e. at the end of the "L-shaped" protrusion.
Cushion the undersides of the lens and the hood
If you, like me, have often the camera placed over a table (or else a shelf or any other horizontal surface) in the long run there is the chance of unwanted scratches to the underside. When the hood is not inserted, Panasonic has prevented this with a nice small protuberance under the lens outside casing, just where it joins the camera. In spite of this, however, the forward tip of the lens casing hangs less than 1mm above the surface, and any small lateral movement may make the casing rim to touch the table. Things are much worse if the hood is inserted (whether extended or reversed), as its lower border will inevitably scratch against the table.
The solution is very simple: just procure self-adhesive black felt pads, ideally about 1mm thick or less, cut two small rectangular pieces of about 10x5mm, and stick them to the underside of both the hood and the lens casing.
Block the nearest part of the Shoulder Strap Eyelet
The “eyelets” are those two protruding metal things where you attach the camera's shoulder strap. If you, like me, find perfectly fit for purpose the FZ300 original shoulder strap, you will notice that the eyelets are far from the camera's “centre of gravity”: actually they are nearer to the camera's back by about 20mm. This means that, when suspended by the strap, the camera does not stand horizontal, but the lens points downwards very ostensibly.
Actually, under the circumstances, Panasonic did their best: the left-hand-side eyelet can hardly be placed any forward, as the camera's body is quite thin there. On the right-hand-side there is much more space along the “hand grip”, and the eyelet is in fact further forward, but placing it too much forward would have imbalanced the camera with respect to the left-hand-side eyelet.
If you are happy with this state of affairs, fine. If you are not, there is a way to improve things just a bit, so that the strap is actually moved 4mm millimetres forward.
You have surely noticed that the eyelet is too wide for the strap: the eyelet groove is 11mm long, while the strap is only 7mm wide. This difference of 4mm is a necessary design feature, because you need some leeway to comfortably move the strap inside the eyelet, both when mounting it for the first time and when adjusting the strap length. The long eyelet is also helpful should you wish to use a different strap. The downside is that, as we have seen, the strap tends to be too near to you with respect to the centre of gravity. Even worse, as the lens goes down, the strap actually hangs from to the nearest part of the eyelets: precisely the opposite of what is desirable!
The solution is not too difficult. Once you have fitted and adjusted the strap, you just block the nearest part of the eyelets with two small—and removable—pieces. These can be made of a coiled thin electrical wire, but I prefer hard rubber. Start by finding a black rubber piece (for example a washer) from which you can cut two small rectangular prisms measuring about 3x4x6mm: once fitted inside the eyelet, the 3mm will be the horizontal left-right dimension, the 4mm the vertical up-down dimension, and the 6mm the forward-backward dimension. For each of the two prisms do the following:
- On any of the two 4x6mm faces (the largest-area faces), make an groove/undercut along the middle, parallel to the 4mm edge. You can do this using any very sharp blade (a common hand cutter with snap-off blades is best, but you can also use either a surgical blade or an old-fashioned razor blade): just produce two 4mm-long cuts at a 45º angle, intersecting each other at about 1mm depth.
- Continue the groove onto one of the 3x4mm faces (the smallest-area faces).
- Wet the prism for easier insertion, and insert it in the eyelet on the back of the strap, the groove against the inner rim of the eyelet. To do this first place the prism above the eyelet, then exert some considerable pressure with a screwdriver until the prism goes inside the eyelet and remains blocked in place. Do not worry: applying pressure with your finger against a rubber piece will not break or dislodge the eyelet: remember it is designed to withstand the weight of the camera plus an external flash, i.e. a total of about 1 kilogram.
Now the shoulder strap will only use the forward part of the eyelet, and the camera will hang from the strap 4mm nearer to the centre of gravity. It is not a full solution, but it helps.