
Our review of Houghton's book
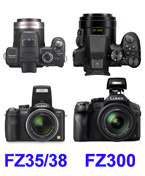
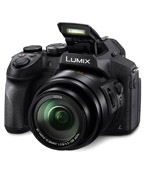
Graham Houghton's "Panasonic Lumix DMC-FZ300 DMC-FZ330 User's Manual" (Manchester UK 2017) is a lovely and well conceived 254 pages long book, and certainly we all agree that "The Panasonic Lumix FZ300 ... fantastic piece of opto-mechatronics is only let down by the hard to read documentation ...". Houghton' book is instead a true manual. In the following review I will comment on many parts of the book, both those (many) I was happy with and also those (few) I was not.
The book is well organised, and my only general criticism is that it would have benefited from better proof-reading: this would have eliminated the hundreds of slips of the pen found throughout the text. For example, some punctuation fix (and even better some re-phrasing) is certainly needed on p.32 when we read that "When you half depress the shutter button to activate both focus and metering then, as the aperture/shutter speed combination is being displayed on the LCD screen if you rotate the back control dial you will enter this mode." Also, thanks to my long experience deciphering instructions translated from Chinese, I was able to decipher on p. 101 the sentence that reads "The lens gaining in sharpness and fewer distortions as it is stopped down 2-3 stops from fully open". It is also confusing to read on p. 240 that "In the next illustration, I show the f-stops with the whole f-stop values in red and the 1/3 f-stops in blue": he surely meant "the f-stops with integer EV values in red and 1/3 EV values in blue", but most importantly, although the "whole" values are indeed printed in red, the 1/3 ones are actually printed in black. Let us hope that a thorough editing will improve the text in a future new edition.
P. 31. "Taking Images Using the Program Auto Exposure Mode (P)". We can read that "If we turn the top mode dial to the “P” position we still have automatic control of the exposure ... however, scene determination is turned off." It would have been useful to clarify, however obvious, that many other "i" features of iA Mode are also turned off: Mode P only automates exposure, aperture and ISO (if set to Auto) and all the other settings are set individually by the user. Accordingly, the advanced amateur should better use "iA" Mode only for unexpected on-the-spot photography, when there is just no time at all for any user settings before taking the picture.
P. 32. "If the[n] you set ISO to Auto, the camera will give priority to increasing the ISO sensitivity before setting too slow a shutter speed". Absolutely true and indeed—although quite obvious—this also applies to Mode A. More detail should have been useful: when 1/100" and ISO 100 are no longer enough, the camera increases both simultaneously, but ISO is increased three times faster. For example, in Mode A, once the user has set a fixed aperture, if speed 1/100 and ISO100 are not enough, the camera will successively set 1/80", ISO200, 1/60", ISO400 and so on. Here is where the user's ISO Limit becomes crucial to avoid excessive noise, especially if tripod or other support is available to avoid a blurry picture.
P. 34. "Shutter priority". "The range of adjustment is from 1 second to 1/16000 sec if the electronic shutter is used and 60 seconds to 1/4000 sec when the mechanical shutter is used." This is true indeed. Perhaps it would have also been useful a further clarification about what happens when the user sets the Shutter Type to Auto (see our Exposure Features webpage, "Mode S").
P. 34. "S Mode ... The camera automatically adjusts aperture to give the correct exposure (and possibly ISO if Auto ISO is selected)". It would have helped to clarify that (unlike P and A Modes) in S mode with Auto ISO the FZ300 will NOT change both aperture and ISO gradually: it will instead modify first the aperture while keeping ISO100: only when aperture 2.8 is not enough will the camera increase the ISO.
P. 35. "... Manual Exposure Mode". The paragraph after the 2nd picture reads "If shutter speed ...previously, then ISO is used to adjust the exposure ...". Actually the camera will do this only if ISO is set to Auto, and will never go over the user's ISO Limit. This can lead to unexpected situations, which is why in Mode M in most cases I suggest to have a Manual ISO setting, so that the three exposure elements (aperture, speed and sensitivity) are all under the full control of the user.
P. 36. Here Houghton highlights yet another shortcoming of the FZ300. "What is not clear is that the period that the shutter can be set to open is limited to 60 seconds. [After this] The camera will close the shutter even if you keep the shutter button, or wire release, depressed." (Actually, clear it is: on p. 89 of the camera's Advanced Manual we can read "Approximately up to 60 seconds", and the actual maximum Bulb time in our camera is 64 seconds). A difference of 4" in 60" is insignificant, and therefore the FZ300 Bulb mode is only useful in those rare situations where you need a very precise manual control of the release, otherwise you can just as well set the shutter time to any of the specified slow speeds from 1" to 60" in 1/3 EV intervals. This is a very serious limitation indeed: forget about those many-minutes-long night pictures with the cars' red lights or the night sky stars trails as the earth rotates.
P. 41-42. "Dioptre Adjustment". Excellent the advice in the first paragraph on p. 42.
P. 56, 59-60. "White balance presets". It explains how to record the optimal white balance by pointing at "either a white piece of paper or grey card such that it completely fills the [measurement] target area ...". Indeed, this is the way to do it very accurately for top professional results. Perhaps it would also have been helpful to clarify that the FZ300 is capable of doing this "on the fly" without any grey card and with relatively accurate results anyway. For example, if you are in a museum and do not have a grey card at hand, just try to find any white/grey curtain or even a white area in a painting and measure it: even if the "white" does not "completely fill" the measurement area, you will get very good results in most cases.
P. 62-63. This excellent discussion of the different Auto Focus systems of this camera is a must-read.
P. 64. "... when using the EVF the focus point sometimes changes ... due to your nose contacting the screen ... you can either turn off the touch screen ..." . The book should have clarified that the FZ300 has a user setting that disables the touch screen when the EVF is in use, turning the touch screen on again automatically when the LCD lights again. (See our Customisation webpage, section "Prevent nose-touch-screen while using the viewfinder", see also the Advanced Manual, p. 52, option "Touch Pad AF").
P. 68-69. "Back Button Focus". Houghton's discussion of how to lock focus and exposure is very interesting, though not always absolutely clear. He should have suggested that very often it is convenient to keep exposure lock and focus lock separate, setting the AF/AE button to perform only the AE lock. My recommended sequence is: 1) ensure that the AFS/AFF/AFC/MF lever is in the AFS/AFF position and that the AFS setting has been selected, 2) point to the subject that requires the best exposure, 3) press the AE/AE LOCK button to lock the exposure, 4) point to the subject that requires the best focus, 5) press half-shutter-down to lock the focus, 6) without moving the shutter move the camera around to compose the final picture frame, 7) press the shutter fully down to take the picture and finally
8) press AE/AF LOCK again to unlock the exposure.
P. 72-73. "ISO". Houghton's printed examples are slightly, but distinctively, better than what I achieve in similar circumstances. Maybe his FZ300 is better than mine? He suggests ISO800 as the maximum value "to preserve image quality", and while I agree to set the ISO limit at 800, my phrasing is "to have the maximum acceptable image degradation". My samples can be seen here in the Digital Noise webpage, where I also explain that the digital noise that you actually see ultimately depends a lot on what you are going to do with the picture: watching it with the utmost detail is one thing, printing it another, and watching it reducing the resolution to your monitor's still another. In the latter case you can often use a very high ISO with hardly any visible noise once the resolution has been resampled, say, from an original 4000x3000 down to 1600x1200 pixels.
P. 87ff. "Time Lapse", "Stop Motion", "Multi Exposure". Excellent detailed treatment of these subjects, very useful for amateurs at their first attempts.
P. 101. "Note that while OIS can reduce the effect of camera shake ... it does not stabilise whatever you are photographing." Indeed! More than one user needs to be reminded about this, however obvious.
P. 105. Good observation on using different aspect ratios: using 1:1 you seem to get a 720mm zoom, but this is "theoretical": it is achieved by cropping, thus using less pixels and resulting in a less-sharp image. In practice, you are getting the same 600mm as before. (Proof: take the picture at a 4:3 ratio, then crop the picture in the PC, and you will get exactly the same result).
P. 110-111. "... front or rear curtain shutter". What Houghton's book calls "Front Curtain" is called "1st curtain" in the FZ300 advanced manual
and accordingly the book's "Rear Curtain" is the advanced manual's "2nd curtain". To add to the confusion, the book states that pictures using the "Rear [2nd] Curtain ... looks more natural ...", while the advanced manual says exactly the opposite: "1st curtain [Front] sync is the normal recording method". Some clarification is in order. IMHO there are different situations (all of them infrequent for the amateur) where one uses the Slow Sync. I use it in two ways:
(A) to get with the flash [thus very sharp] a nearby subject while there is a blurry background: in this case it may be preferable to use Front/1st curtain because it lets you first take the flash picture of a person and then wander about blurring the background as long as you wish;
(B) to get a moving object such as a car with a final sharper image at the end of the motion: for this you need Back/2nd curtain.
P. 115. Describes "outstanding video quality" exemplified by a "boom mic" on the above picture. Only later on P.123-124 the text explains the volume control and clarifies that "for video with good audio content it is advisable to use an external microphone": its use is explained later on P. 201-208.
P. 128-136 and 214-217. An excellent introduction to shooting in RAW, IN-CAMERA raw processing and processing with PC software.
P. 147. Houghton has noticed (as we already had in our "Attention!" note in our Camera Bags webpage) the dangers of having a finger trapped by the lens when it automatically retracts (either after not being used for 15 sec. or when the camera is shut down). Your finger will not suffer any significant damage, but in the long term this is certainly not good for the camera.
P. 164. Excellent explanation of how to achieve motion blur (exemplified with a waterfall) by using a tripod and a ND filter.
P. 171ff. "Accessories ...". A comprehensive treatment.
P. 172. UV filter: Houghton is against its general use. He observes that optically its use is not necessary in a digital camera and therefore it will add a (however infinitesimal) distortion to the image. For a professional photographer, working in a studio or carefully controlled outside environment, he has a good point. Nevertheless, I have repeatedly made the test, taking the same picture with and without the UV filter, and have failed to notice even the minimal difference. More importantly, for the casual amateur, who works mostly in outdoors tourist situation or indoors parties, the front of the lens soon gathers lots of dust and smear and eventually small scratches as well, and while dust and grease can be removed, scratches cannot. Many professional photographers I have met, including back in the film era, recommended the permanent use of the UV filter for the protection of the lens surface: after a few months or years you just replace the relatively-inexpensive UV filter.
P. 173. Polarising filter. The book shows the same picture without and with it. In the printed version of the book the difference is minimal. In practice, if the filter is properly aligned with reflections (as correctly explained in the text), the difference is very significant.
P. 173. Graduated filter. He advises how to make one using sheets and holders. He should have mentioned that, although not of the very finest quality, ready-made screw-in 52mm graduated filters are also available.
P.181-184, 186-191. An interesting in-depth discussion of external flashes and additional related accessories.
P.192-196. A good treatment of wide-angle and telephoto conversion lenses or "extenders". Houghton lists all the related caveats and issues, and although he does not state it explicitly, the conclusion is that these relatively expensive, heavy and clumsy accessories are to be avoided. If the FZ300 wide-angle is not sufficient for your subject, you can shoot two pictures and then merge them using PC software. If the FZ300's huge optical telephoto is not sufficient, you can use—as suggested by Houghton—the camera's digital zoom.
P. 201-208 . "External microphones for video". Excellent treatment of either stereo mics or mono mics connected to a special box. It does not, however, deal with the best solution when you already have a "traditional" set of two studio-quality mono mics: you should use an (admittedly not easy to find) Y-stereo adaptor with a 3.5 stereo plug output. You can plug this directly to the camera, which will recognize the two mic inputs separately and record video with full stereo separation and hi-fi audio quality. I have done this with outstanding results.
P. 219-224. A very good treatment of White Balance settings.
P. 239-243. A very good treatment of photo exposure.
CONCLUSION: Houghton's book is comprehensive and well written. It is not perfect (which book is?), but is still the best detailed treatment of the FZ300 available, and as such it is certainly worth buying and reading end-to-end. Kudos to Graham Houghton for this impressive achievement.