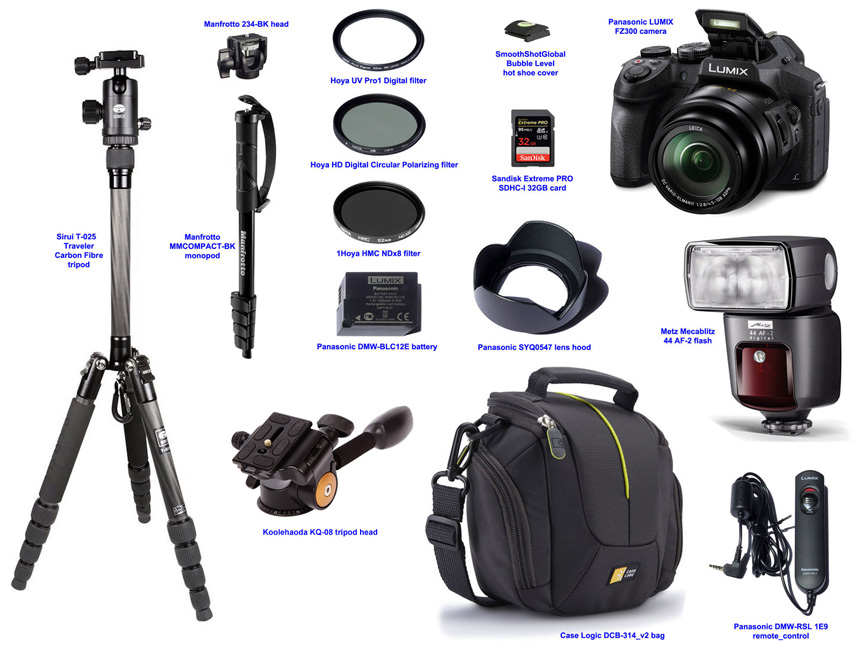

Recommended Accessories and user tips
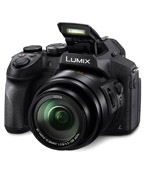
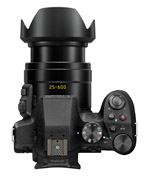
The FZ300 with its fixed zoom lens and its bundled accessories (lens hood, lens cap, battery pack, battery charger, shoulder strap and USB cable) may look like a complete kit. Nevertheless, I strongly believe that the keen photographer should be ready to spend in accessories perhaps as much as in the camera. In my experience, it will be money well spent. Find below the list of accessories I recommend for the FZ300. I recommend shutting off the camera before inserting/removing either the hood or any filter: if the lens was having any internal movement (and this can happen automatically) the camera will display a message error and you have to shut it down and restart it anyway.
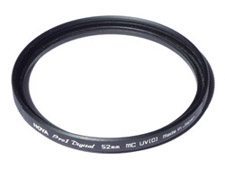 UV filter. To be inserted permanently. The degradation in picture quality produced by protecting the lens with a top quality filter (for example the Hoya UV Pro1 Digital Filter 52mm, show in the picture) is absolutely negligible. The alternative is to see your beautiful lens, no matter how careful you are with the lens cover, degraded with time by the inevitable smears and scratches. A further advantage of the UV filter is that you no longer need the lens cover, which not only is cumbersome but also will eventually produce scratches in the camera body.
Step-up 52-58mm ring. Once a UV filter is screwed in, inserting further 52mm filters may produce “vignetting”, a dramatic darkening of the picture's corners. In some cameras this happens throughout the wide-angle range, but in the FZ300 a second filter produces vignetting only in the 25-30mm range (in my camera vignetting is only visible in the upper left corner). Accordingly, if you wish to insert further filters over the UV without vignetting, you have three alternative solutions:
- Avoid using the 25-30mm range: this is my preferred solution.
- Use the full zoom range and fix any vignetting in your PC with your image processing software.
- Use a step-up ring and buy the additional filters with a 58mm diameter. Mind that the step-up ring prevents inserting or removing the hood, so you will normally store the ring away, with your favourite filter screwed in. All things considered, using and storing a step-up ring is more cumbersome than it looks at first sight.
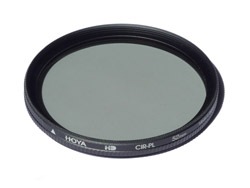 Polarising filter. This is a must, because filtering some polarised light can dramatically improve some outdoors pictures. This filter minimises reflections, darkens the sky and helps to remove haze in the distance. An excellent comparison of the same picture without and with this filter can be seen in this Techradar webpage. This filter should be of top quality, such as the excellent but expensive Hoya HD CIR-PL DIGITAL Filter, shown in the picture. User tips:
- All polarising filters have a rotating outer mount, because the effect is strongly dependent on the position. The effect is visible onscreen, but it is much better to find the best angle by looking directly through the filter before inserting it onto the camera lens.
- Once it is inserted, always rotate the outer part in the same sense you inserted the lens
(that is, clockwise if you are looking into the lens, or anticlockwise if you are looking through the viewfinder): this will prevent you from undoing the filter from the lens. - This filter will change the colour balance. If you wish to counterbalance this, set the camera's White Balance to AWB (Automatic White Balance), otherwise use any other WB setting.
- Check the exposure on the viewfinder. Quite often the polarising filter leads to underexposure: correct as needed with the Fn1 +/- button plus Rear Dial.
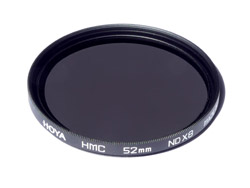 Neutral Density filter. This is handy to narrow the depth of field, especially to blur the background in portraits when you do not want—or cannot—use a high enough shutter speed that allows to use the maximum 2.8 aperturer. I recommend a filter rated at 8x: this produces an effect equivalent to 3 EV or 3 aperture stops: a very good one is the Hoya HMC NDx8. The ND filter is normally used for portraits, avoiding the wide-angle range: therefore there will be no vignetting in the FZ300 and you can safely use a 52mm filter, easier to insert than a 58mm attached to a step-up ring.
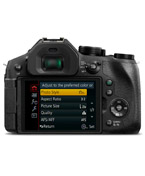
Star filter. You do not need this one! See the Advanced Manual, p.103. Set the Mode Dial to Creative Control (palette symbol) and move the up/down arrows till you get to the “Star Filter” effect: you can even select variants, with different number of rays, ray length and ray angle.
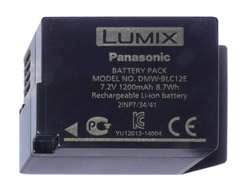
Spare battery. This is your most important accessory, to be carried with you at all times, charged and ready to replace the one you have in the camera when it runs out of charge. I advise to buy the original Panasonic DMW-BLC12E. Please read full details about this matter in our Battery Life page.
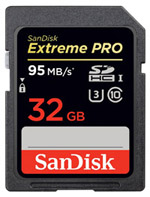 Spare memory card. With present-day low-priced 32G and even 64G cards, who needs a spare? Probably only if you take lots of movies or embark in a one month trip, and not even then if you, like myself, every day or two download your pictures to a laptop and make a backup to a USB key just in case. But since memory cards are very slim and take up no space in the bag, I always carry an old memory card, which can be handy for example if somebody asks me to take a set of pictures which I later wish to download separately. A spare card is also invaluable in the very rare case when a card stops working: you do NOT wish to “Format” the card, because this will erase the pictures that later—back home—you can recover using special PC software.
Should we use a full SD card or a MicroSD card with an adapter? Comparative tests were already published 4 years ago, when MicroSD tended to be slower and full SD more expensive. This is no longer the case nowadays: Graham Houghton (see our Manual page) finds that using a MicroSD card with an adapter produces identical results at a lower cost, and therefore recommends the MicroSD. I beg to differ: when cards and adapters are brand new, he is certainly correct. However, after a few years and in damp environments, unless very heavily gold plated, contacts tend to corrode, and therefore (1) a set of large contacts is likely to have less problems and (2) two sets of contacts will have more problems than a single set. I prefer a full SD card.
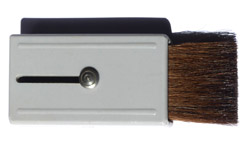
Cleaning material. I carry in the bag the usual small antistatic cloth (in case I accidentally touch the UV filter). I also carry a small flat brush, good to clean out dust and sand when needed.
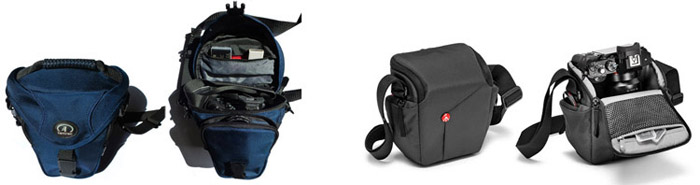
Comprehensive and protective bag. By this I mean a bag that, within a relatively small size and weight, fits the camera snugly, protects it against accidents during travel and includes pockets for all the accessories listed above. See our Camera Bags webpage.
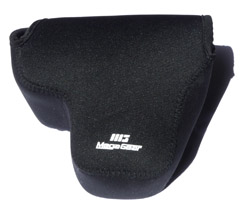
Light cover. A minimal-weight simple neoprene cover is handy,
instead of the full bag, for a nice day/night out with occasional photography. These bags need to be especially made for every
camera model, and are in short supply. I managed to find the
very good MegaGear Fotocamera Custodia Neoprene Borsa Per Panasonic Lumix DMC-FZ300: it is available from Amazon.IT,
but not from Amazon.UK.
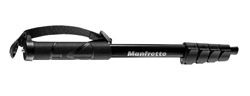 Monopod. This doubles as a walking stick and is very useful in churches and other relatively dark places. Most museums and many churches will not allow you to use a tripod, but quite a few will accept—perhaps grudgingly—the use of a monopod. The MANFROTTO MMCOMPACT-BK MONOPIEDE NERO is very light, resilient and reasonably priced. The bottom rubber "foot" is very thin. If you are going to use this as a walking stick, it will wear out in no time: to prevent this, just insert over it a small table-leg rubber cap.
 Having also bought the matching Manfrotto 234 monopod head, I often do not carry it: it significantly increases the monopod's weight, and in most situations you will make do by just tilting the monopod away from the vertical. Handy only in museums where tripods are not allowed and tilting the monopod can be tricky.
Tripod. A full-size tripod is a must for pictures of night landscapes. It also allows taking much better pictures in dark building interiors. The available selection is huge in features and price and the reader is advised to search for the best personal solution. I only use the tripod occasionally and looked for one that was both sturdy and very lightweight. After much searching I bought the SIRUI T-025X Carbon fibre tripod, and recently my brother gave me his Cullmann MAGIC 2. Both tripods include a ball head, reach a height of over 130 cm and are very solid. Find below pictures of the SIRUI.
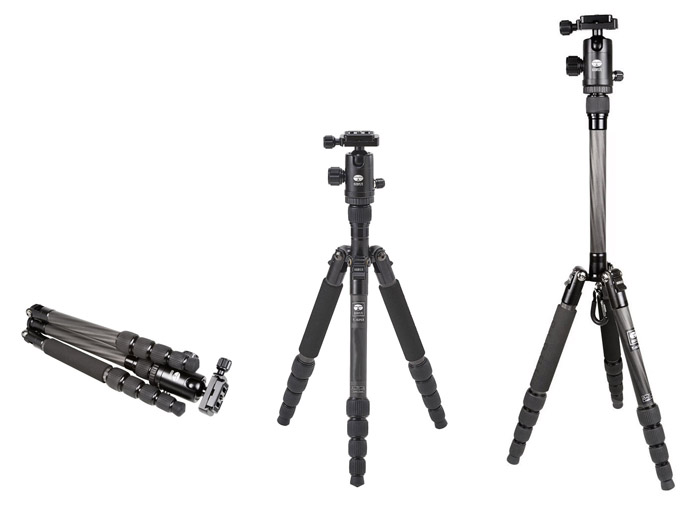
This Sirui model is the lightest tripod in its class at just 800 gr, and it folds down to a ridiculous total length of 35 cm, thus being ideal for long tourist walks. It can be mounted in many different ways and is thus best for close-up photography. It cost me €245. The Cullmann is significantly heavier at 1350 gr, and it folds down to a total length of 40 cm, but with a perfectly flat shape, thus being ideal for minimising space in a suitcase. It is slightly sturdier and is therefore best for extreme telephoto pictures. It can be had at about €210.
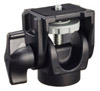
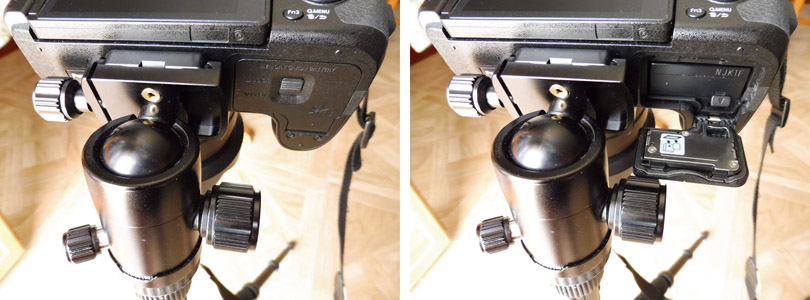
Tripod head. Most photographic light tripods, such as the Sirui above, carry a “ball head”: you move around your camera with one hand until you get it to the position you are looking for and then with the other hand you turn around the blocking knob. It looks very simple but, if your camera is not a pocket one and/or your hand is not too steady, you have to loosen the knob more than once to correct the position. Also, needless to say, this type of head is almost useless for movies. 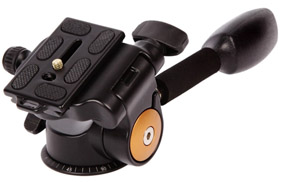 For this reason I much prefer the “handle head”, allowing you to turn the camera up-down steadily (and block the movement with the handle), turn it around steadily (and block this with a special knob) and even tilt the camera vertically (securing its position with a third knob). These handles are often professional and as expensive as a tripod. A nice exception is the Koolehaoda KQ-08 360º tripod head with handle, a very good piece of kit, not too heavy and very economical at €24. And of course, since both the original Sirui ball head and the Koolehaoda attach to the tripod with the standard 1/4" screw, you can easily swap heads if you wish so. Needless to say, both heads carry a detacheable plate which (1) can be fixed to the camera without obstructing the battery-and-card compartment door and (2) allow for fast removal and reinserting of the camera into the tripod. The picture below shows how you can attach the original Sirui ball head to the camera so that the battery-and-card compartment can be opened with the camera on the tripod.
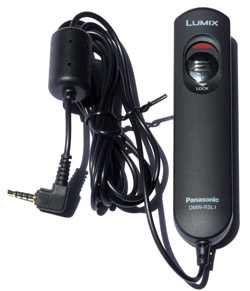 Remote control. With this camera your smartphone acts as a wireless remote control, but (a) you need to start the communication in both phone and camera and (b) is less than practical for a succession of many pictures using a tripod, for example encompassing all the works of art in a large church. Alternatively and more conveniently, this camera allows a dedicated remote control to be inserted: this guarantees that the camera on the tripod will keep perfectly steady during any long exposure. Third-party solutions are available, but I like the Panasonic DMW-RSL1E9, which is compatible with most Panasonic cameras from the FZ50 onwards (though cheap it is not at €69) and replicates the two steps of the camera's shutter button.
[This remote control also allows locking the shutter open, thus saving you the hassle of keeping the button pressed during long-exposures in “Bulb” Mode, although the usefulness of Bulb Mode in this camera is very limited because of its maximum exposure time of only 64 seconds].
Quite obviously, if the Mode dial is set to "Creative Video Mode", the remote control (which normally takes pictures) will start-stop the video instead.
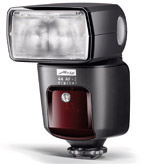
External Flash: see our External Flash webpage.
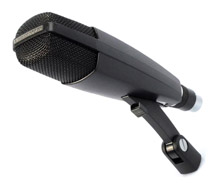
External Microphones. See our Sound Recording webpage.
All together! The pìcture below shows the FZ300 camera with most of the above accessories.