


Unboxing and Assembling the SkyMax-102 AV
UNBOXING. Please find below the pictures I took while unboxing the telescope. Needless to say, the separate cardboard boxes are handy for storing the telescope parts until you have suitable bags.
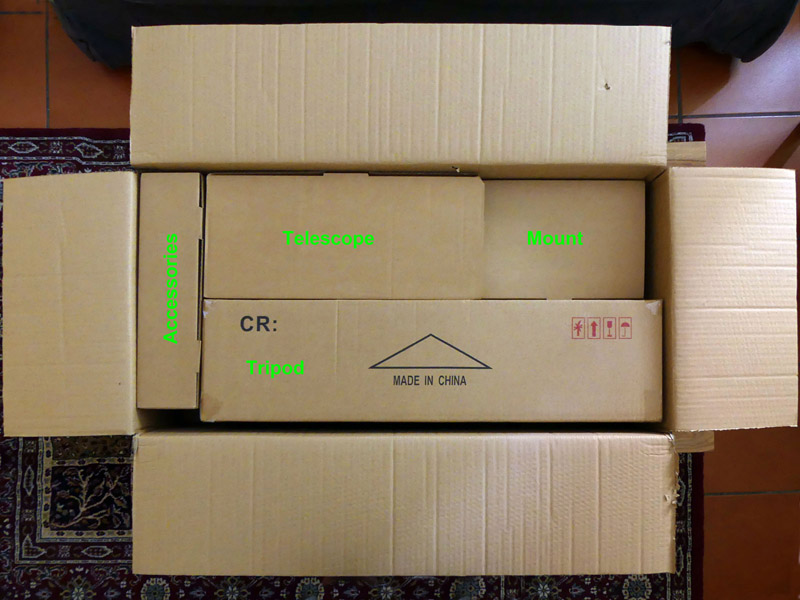
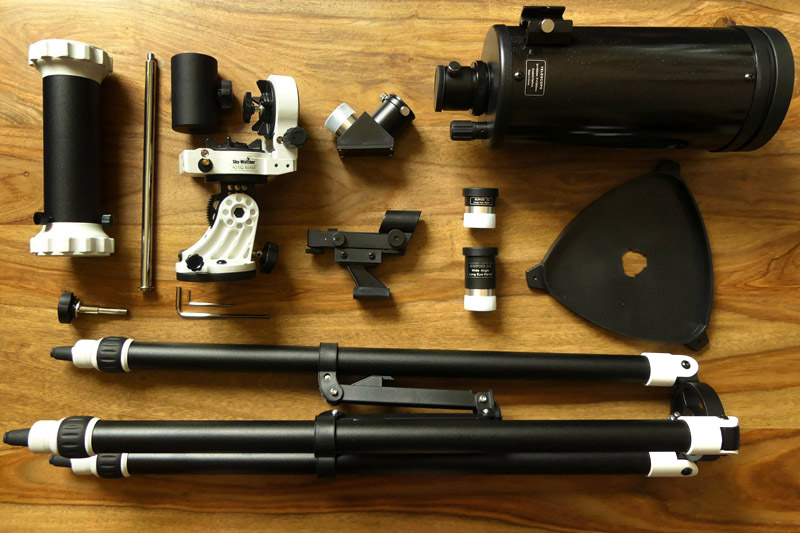
It is a real pity that no bags are supplied with this telescope and, even worse, no customised bags or cases for any of its components are available. Getting the best possible bags proved to be tricky: see our Bags & Cases webpage. The next picture shows the full contents of the boxes:
ASSEMBLY. Assembling the SkyMax-102 AV is straightforward. Have at hand the enclosed printed leaflet, entitled “INSTRUCTION MANUAL AZ-EQ AVANT Mount”. In case you have lost it and wish to reprint it, it is not available online, but feel free to download my own hi-resolution scans.
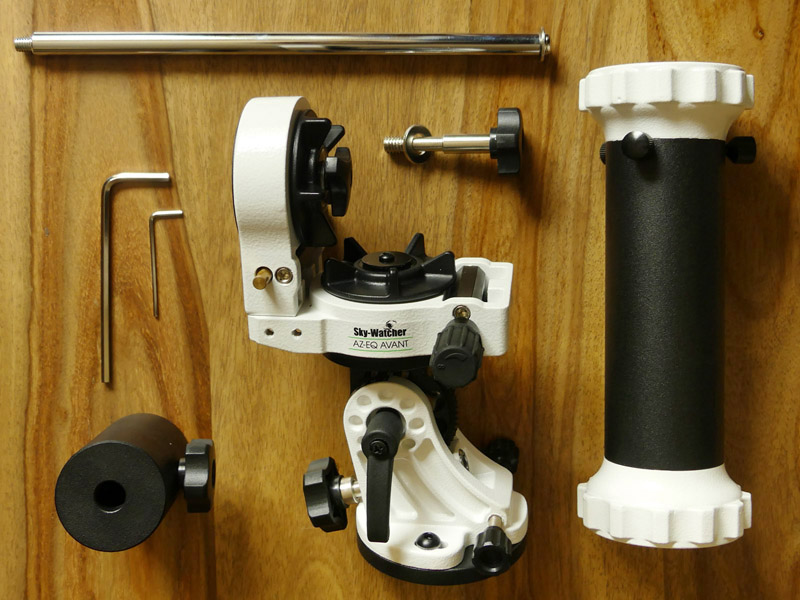
1) Extension tube. This is meant to be inserted between the tripod and the mount. However, if you are less than 168 cm (5ft 6in) tall, you may feel more comfortable not using the extension tube at all, and attaching the mount directly to the tripod (see the Manual p.1 Fig. 1.1c). If in doubt do use the tube, because its significant weight adds stability to the otherwise light tripod, and it will allow full freedom of movement for the mount even when looking at extreme altitudes such as either near the horizon and the cenit. The lower end of the extension tube is attached to the tripod via the latter's simple rotating lever. However, attaching the upper end of the tube to the mount involves 6 operations:
(A) loosen up the tube's three lateral knobs,
(B) take out the top white part of the tube,
(C) extract the knob from inside the tube where it often falls,
D) use the knob to secure the top white part firmly to the mount,
(E) attach, to the top white part, the black cylinder and
(F) fasten the three lateral knobs while keeping the cylinder carefully centred to the top part (Manual p.2 Fig. 1.2). Clearly it is practical to avoid this operation every time you assemble the telescope: if you use the tube, keep it always attached to the mount. The rest of the telescope assembly sequence is straightforward.
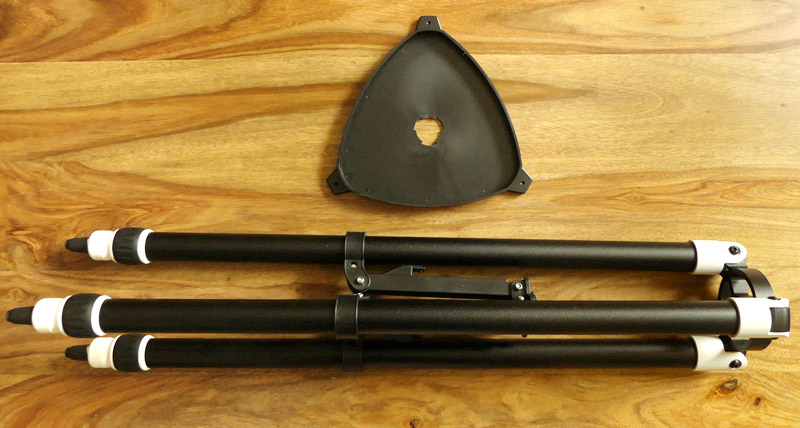
2) Tripod. Extend and open the tripod legs and insert the accessory tray (Manual p.1 Fig. 1.1b): its main purpose of it is to add stability to the tripod. It also prevents the legs from closing if the tripod is inadvertently pushed.
3) Mount with Counterweight. Attach to the tripod the mount (with or without the tube) and fasten it with the tripod's rotating lever (Manual p.1 Fig. 1.1c). Attach to the mount the balance bar with the counterweight (this provides stability and balance, but for a very short observation is optional): fix the latter at the end of it by means of the Lock handwheel (Manual p. 7 Fig. 2.3a).
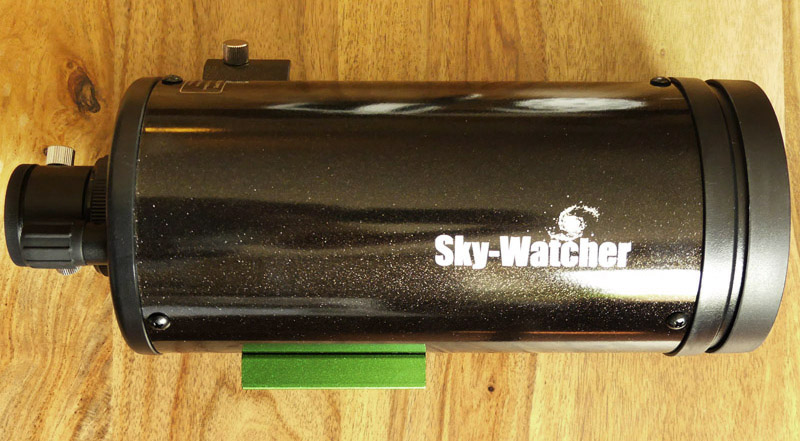
4) Telescope. Attach the telescope's green base to the mount. Of the two holes, select the one that provides the best weight balance: with just a diagonal and eyepiece you are better off with the hole farthest from the eyepiece. However, if you are going to fit either a heavy eyepiece or a smartphone and its adapter, you should use the hole nearest to the eyepiece. Secure the telescope to the mount by turning the “telescope clamping knob” (Manual p. 7 Fig. 2.3a) with a hand while holding the telescope with the other: keep holding the telescope until you verify that it is firmly attached to the mount. If you drop the telescope to the ground, chances are that it will suffer irreparable damage.
Any telescope larger than this one requires the two hands to hold it, and therefore attaching it to the mount becomes a significantly more complicated and risky affair, best carried out with the help of another person. This is yet another good reason to begin our astronomy hobby with a telescope not larger than this one!
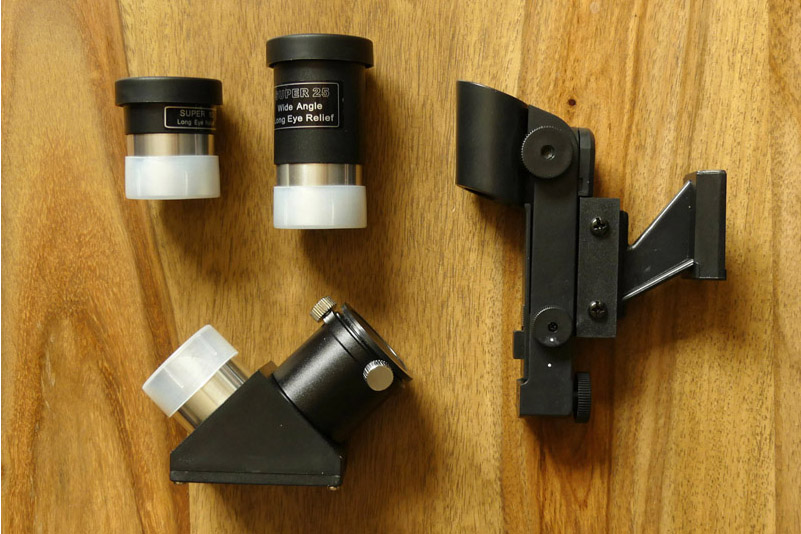
5) Accessories. Attach to the telescope's finder bracket the red-dot-finder, the diagonal and any of the eyepieces, as well as other additional or alternative accessories you may have, such as Barlow lenses, alternative diagonals, alternative eyepieces, cameras or filters. Fix everything with the retaining screws, turning them just enough to hold the pieces steady, but mind that you are turning steel screws into aluminium holes.
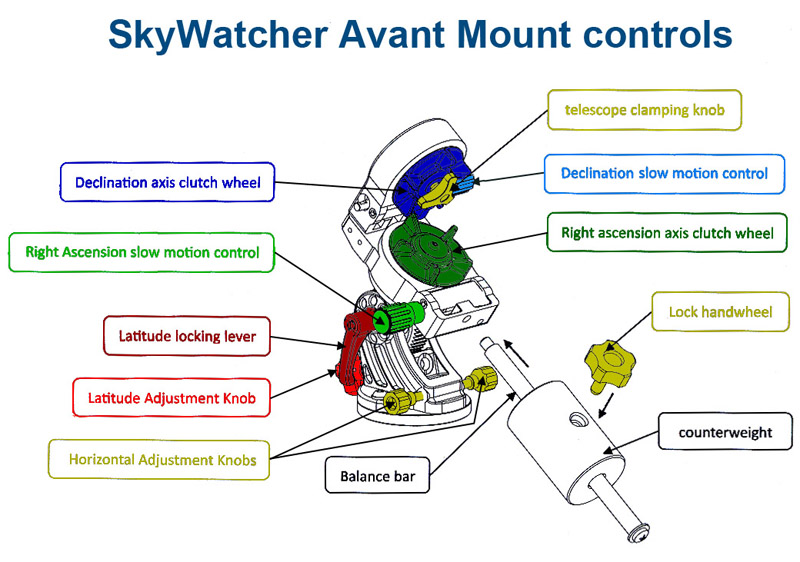
USING THE SKYMAX-102 AV. I have mentioned above the enclosed manual that shows how to assemble the tripod and the mount, as well as the basic functions of the latter. In the following diagram I have added colours and labels for the different functions:
As for the basics of using this telescope, you should download Skywatcher's two-page very basic—yet useful—
Instruction Manual for Skywatcher Maksutov telescopes.
For more advanced directions, just have in mind that the SkyMax-102 AV is a standard Maksutov telescope with a versatile but otherwise standard manual Equatorial mount. Full astronomy and telescope tutorials are included in computer programs for astronomy and in several websites, and it makes no sense to try to emulate that material here.